

As a business owner, ensuring that your emails reach your recipients’ inboxes is crucial for effective communication and how to fix message blocked in Gmail might become a priority quickly if your clients are not receiving your emails. Examples of non-delivery are error messages like
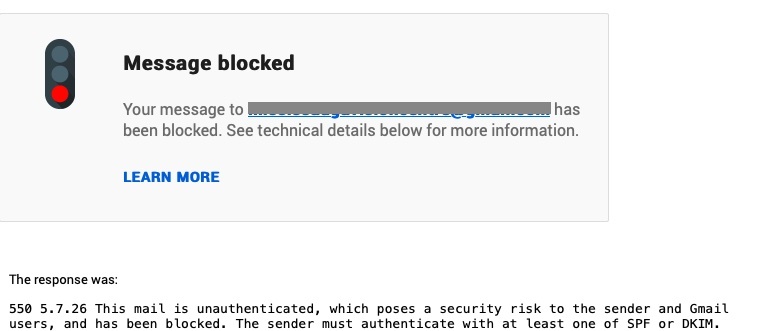
“Message Blocked! 550 5.7.26 This mail is unauthenticated”
when sending emails to clients using popular email service providers like Gmail or Outlook. This error typically indicates a lack of proper email authentication, which can lead to your messages being marked as spam or blocked altogether.
To understand why that is and how this whole thing works, you can check out our article explaining in as non-geeky as it can get
The “email is unauthenticated” fix
Thankfully, you can resolve this issue by configuring your DNS records to include SPF, DKIM, and DMARC records. These authentication mechanisms provide proof of sender identity and improve email deliverability.
In this step-by-step guide, we will walk you through the process of adding SPF, DKIM, and DMARC records to your DNS settings, ensuring that your emails are authenticated and successfully delivered. In tis tutorial we will assume you have registered your domain at GoDaddy and are using their Nameservers and DNS. All this process applies to any registrar or DNS management service, but the entries might slightly defer.
So let’s dive in and take the necessary steps to authenticate your emails and ensure their successful delivery!
Tutorials table of contents
Depending on your email setup, you can learn how to fix message blocked in Gmail by using one of the three scenarios that apply to your situation:
- Scenario #1 : You are using Google workspace to send your emails
- Scenario #2: You are using Outlook/Office 365 to send your emails
- Scenario #3: You are using another email service to send your emails
Scenario #1 : You are using Google workspace to send your emails
Adding SPF Record
- Log in to your GoDaddy account and navigate to your domain’s DNS management page.
- Locate the section for adding DNS records (this may vary depending on the GoDaddy interface).
- Create a new TXT record by selecting the “Add” or “Create Record” button.
- In the “Host” or “Name” field, enter
@to apply the SPF record to your domain. - In the “TXT Value” or “Text” field, paste the following SPF record:
v=spf1 include:_spf.google.com ~all
- This record allows Google’s servers to send email on behalf of your domain.
- Save the changes, and the SPF record will be added to your DNS settings.
Adding DKIM Record
- While still in the DNS management page, locate the section for adding DNS records.
- Create a new TXT record as before.
- In the “Host” or “Name” field, enter
google._domainkey. - In the “TXT Value” or “Text” field, paste the DKIM record provided by Gmail. Note: To obtain your DKIM record, follow these steps:
- Generate DKIM record:
- admin.google.com > Apps > Google Workspace > Gmail > Authenticate email > Generate new record > Generate
- Once added , come back here (in the Admin Console) and click on Start authentication.
- Generate DKIM record:
- add it to your DNS records in your DNS service provider page, using this information:
v=DKIM1; k=rsa; p=THE RECORD YOU GENERATED ABOVE
- Save the changes, and the DKIM record will be added to your DNS settings.
Adding DMARC Record
- Once again, access the DNS management page for your domain in GoDaddy.
- Create a new TXT record.
- In the “Host” or “Name” field, enter
_dmarc. - In the “TXT Value” or “Text” field, paste the following DMARC record:
v=DMARC1; p=none; rua=mailto:your@email.com; ruf=mailto:your@email.com; fo=1; adkim=s; aspf=s
- Replace
your@email.comwith the email address where you want to receive DMARC reports. - Save the changes, and the DMARC record will be added to your DNS settings.
Please note that DNS changes may take some time to propagate. It can range from a few minutes to a couple of hours. Once the changes are propagated, email services should recognize the added SPF, DKIM, and DMARC records, and the “550 5.7.26 This mail is unauthenticated” error should no longer occur.
Scenario #2 : You are using Outlook/Office 365 to send your emails
Adding SPF Record
- Log in to your GoDaddy account and navigate to your domain’s DNS management page.
- Locate the section for adding DNS records (this may vary depending on the GoDaddy interface).
- Create a new TXT record by selecting the “Add” or “Create Record” button.
- In the “Host” or “Name” field, enter
@to apply the SPF record to your domain. - In the “TXT Value” or “Text” field, paste the following SPF record:
v=spf1 include:spf.protection.outlook.com -all
- This record allows Outlook’s servers to send email on behalf of your domain.
- Save the changes, and the SPF record will be added to your DNS settings.
Adding DKIM Record
- Login at security.microsoft.com/dkimv2
- Select the domain that you are sending mail from
- Click Create DKIM Keys
- Go back to the Godaddy DNS management page, find the section for adding DNS records.
- Add two new CNAME records:
- All the DKIM Keys have the same format. In the example below you can replace contoso-com with your domain name and
contoso.onmicrosoft.comwith your onmicrosoft.com domain. - Name: selector1._domainkey / Value: selector1-mydomain-com._domainkey.mydomain.onmicrosoft.com
- Name: selector2._domainkey / Value: selector2-mydomain-com._domainkey.mydomaincom.onmicrosoft.com
- All the DKIM Keys have the same format. In the example below you can replace contoso-com with your domain name and
- Enable signature:
- Go back to the Security Admin Center and enable DKIM for your domain
- Select your domain
- Enable “Sign messages for this domain with DKIM signatures”
- Save the changes, and the DKIM record will be added to your DNS settings.
Adding DMARC Record
- Once again, access the DNS management page for your domain in GoDaddy.
- Create a new TXT record.
- In the “Host” or “Name” field, enter
_dmarc. - In the “TXT Value” or “Text” field, paste the following DMARC record:
v=DMARC1; p=none; rua=mailto:your@email.com; ruf=mailto:your@email.com; fo=1;
- Replace
your@email.comwith the email address where you want to receive DMARC reports. - Save the changes, and the DMARC record will be added to your DNS settings.
Please note that DNS changes may take some time to propagate. It can range from a few minutes to a couple of hours. Once the changes are propagated, email services should recognize the added SPF, DKIM, and DMARC records, and the “550 5.7.26 This mail is unauthenticated” error should no longer occur.
Scenario #3: You are using another email service to send your emails
Adding SPF Record
- You will need to find the appropriate SFP record entry for your email service provider. You can try:
- Google: SPF record for INSERT EMAIL PROVIDER NAME HERE
- Write to their support or go through their FAQ and search for SPF
- It should look something like:
v=spf1 include:_spf.EMAIL_PROVIDER_DOMAIN ~all
- Log in to your GoDaddy account and navigate to your domain’s DNS management page.
- Locate the section for adding DNS records (this may vary depending on the GoDaddy interface).
- Create a new TXT record by selecting the “Add” or “Create Record” button.
- In the “Host” or “Name” field, enter
@to apply the SPF record to your domain. - In the “TXT Value” or “Text” field, paste the SPF record you found
- Save the changes, and the SPF record will be added to your DNS settings.
Adding DKIM Record
- You will need to find how to generate your DKIM public encryption key for this AND what DKIM KEY NAME entry you need to use. You can try:
- Google: DKIM generation record for INSERT EMAIL PROVIDER NAME HERE
- Write to their support or go through their FAQ and search for DKIM
- the DKIM DNS with the DKIM public encryption key entry should be a long string of letter numbers and symbols
- the DKIM KEY NAME should be something like:
- just the word : key or
- the email service provider name like: google or email
- important: if you are unsure write to your email service provider support.
- While still in the DNS management page, locate the section for adding DNS records.
- Create a new TXT record as before.
- In the “Host” or “Name” field, enter DKIM_KEY_NAME_FROM ABOVE ._domainekey : key._domainkey or email._domainkey or …
- In the “TXT Value” or “Text” field, paste the DKIM record and include the DKIM public encryption key. Should look like:
v=DKIM1; k=rsa; p=THE DKIM PUBLIC KEY YOU GENERATED ABOVE
- Save the changes, and the DKIM record will be added to your DNS settings.
Adding DMARC Record
- Once again, access the DNS management page for your domain in GoDaddy.
- Create a new TXT record.
- In the “Host” or “Name” field, enter
_dmarc. - In the “TXT Value” or “Text” field, paste the following DMARC record:
v=DMARC1; p=none; rua=mailto:your@email.com; ruf=mailto:your@email.com; fo=1;
- Replace
your@email.comwith the email address where you want to receive DMARC reports. - Save the changes, and the DMARC record will be added to your DNS settings.
Please note that DNS changes may take some time to propagate. It can range from a few minutes to a couple of hours. Once the changes are propagated, email services should recognize the added SPF, DKIM, and DMARC records, and the “550 5.7.26 This mail is unauthenticated” error should no longer occur.
Conclusion
Congratulations! You have successfully learned how to fix the “550 5.7.26 This mail is unauthenticated” error in Gmail and Outlook by configuring your DNS records with SPF, DKIM, and DMARC settings. By implementing these essential email authentication measures, you have taken significant steps towards improving your email deliverability and ensuring that your messages reach your recipients’ inboxes.
Remember to allow some time for the DNS changes to propagate fully. Once the changes take effect, you can bid farewell to the frustrating “unauthenticated” error and enjoy smoother email communication.
However, we understand that dealing with DNS settings and email authentication can be a bit overwhelming for some business owners. If you find yourself in need of additional assistance or if you would prefer professional support to set up these configurations, our team at PixelTrail is here to help.
Don’t hesitate to reach out to us if you have any questions or need further assistance. We are dedicated to helping you overcome this crucial email hurdle and maximize the effectiveness of your business communication.
We hope this helped you out!